Let’s talk about Tagging. Sure, it’s not the most exciting topic, so why read about it? Well, because like many things, it’s not a problem until it is! My goal in this post is to impress upon you two things:
- The importance of tagging and how a little bit of upfront work can go a long way.
- How to wrangle tags when things get unwieldy and you need some fast results
The Process
When working with large groups of business units, it’s very easy to lose sight of what is getting deployed. This can become an issue when you’re trying to find out something simple and urgent – how much is this environment costing us? Take for example, this scenario: You have a big AWS bill, and you are asked to get costs under control. The issue is, a tagging standard has been loosely defined and not strictly followed. So where do you begin to understand where the money is going?
Enter: AWS Cost Explorer
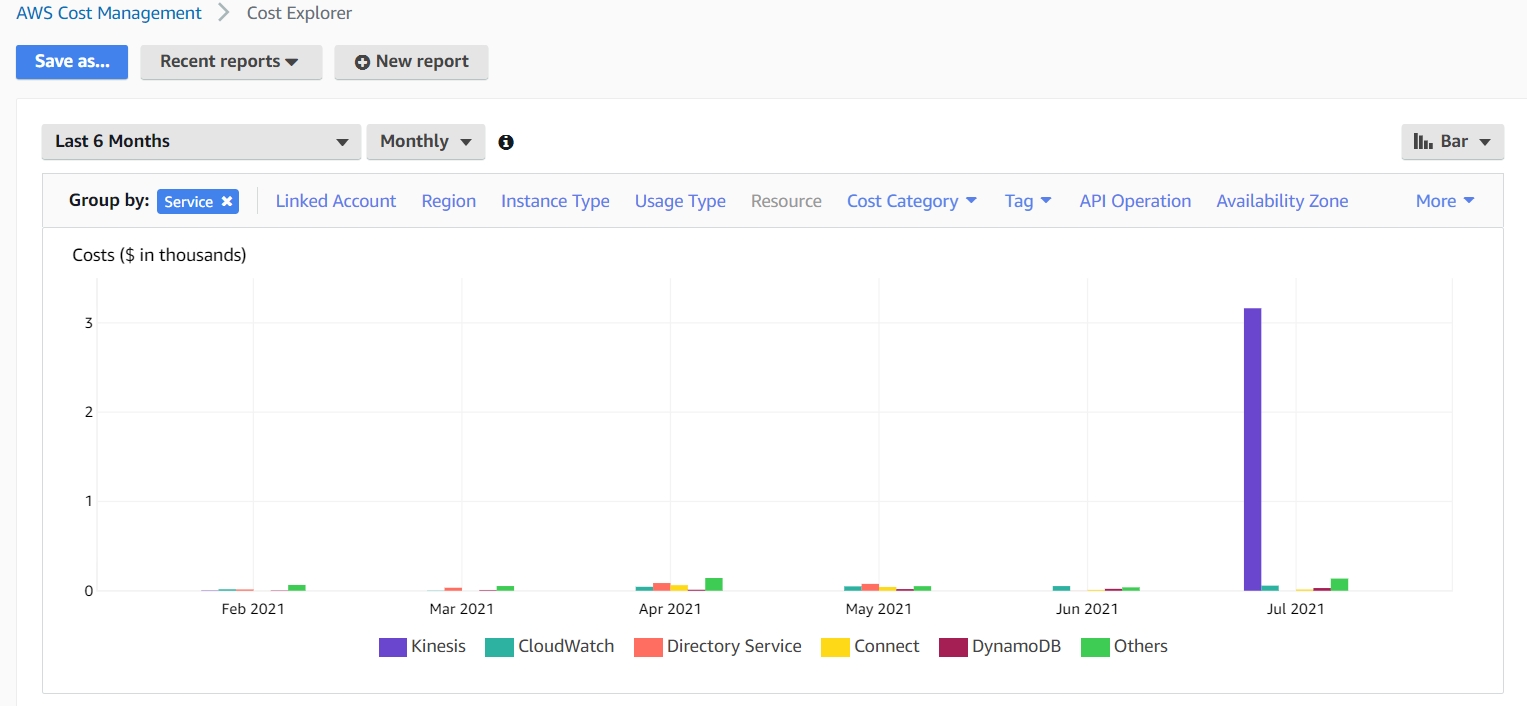
One of the easy things is to first go here and figure out – what are your top spenders? Remember, this can be a job of diminishing returns, so you want to take those big slices first, figure out where at least 80% of your cost is going. Here from this screenshot we can see that the lion’s share of the spend is coming from AWS Kinesis. Use the data from Cost Explorer to guide your tagging efforts.
Next Step: Resource Groups and Tag Editor:
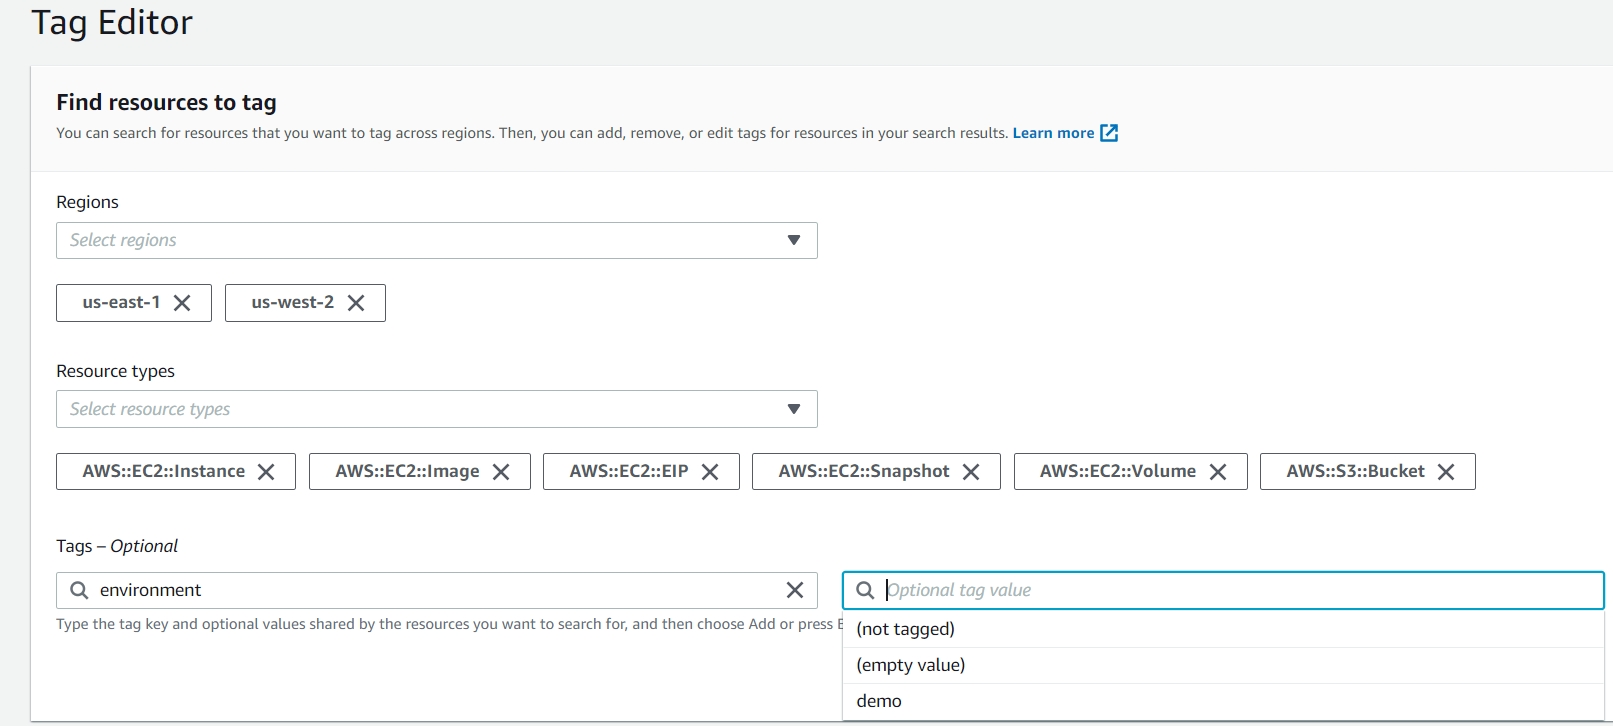
This is where you can go, account by account, and do the heavy lifting of tagging hundreds of resources at a time. Thankfully, AWS has made this a simple process with the evolution of this service. In the below example, I’m going to search for all EC2 instances that do not have an tag key named: ‘environment’. Let me break down the different options we have here.
Regions: Self-explanatory, if you perform a search for all regions all resources you can have a very large and more difficult to work with set of results. If you know that most or all of your workloads are in certain regions, then it’s a good idea to select them here.
Resource Types: This gets very granular and lists all AWS services that can be tagged (There are a great many!) Keep in mind that not all of them incur cost, and some are very minimal. For this example we are going to focus on some of the big spend items for EC2: Instances, EBS Volumes, EBS Snapshots, AMIs, Elastic IPs, and I threw in there S3 buckets as well as a bonus service to check for. Of course, you can simply select ‘all services’ and work with the data there. So far there is no option to typeselect wildcards such as EC2:*, so you will have to click on each subset of the service you want to search for.
Tags: This optional field has been very helpful for me, and I think it will be for you too. Say for example, you have a new organizational requirement that all resources need to have an environment tag – well simply select ‘environment’ from the dropdown (this reads tags in your account, so you select from a list) – then for the optional tag value field, select ‘not tagged’. The field supports multiple conditions as well.
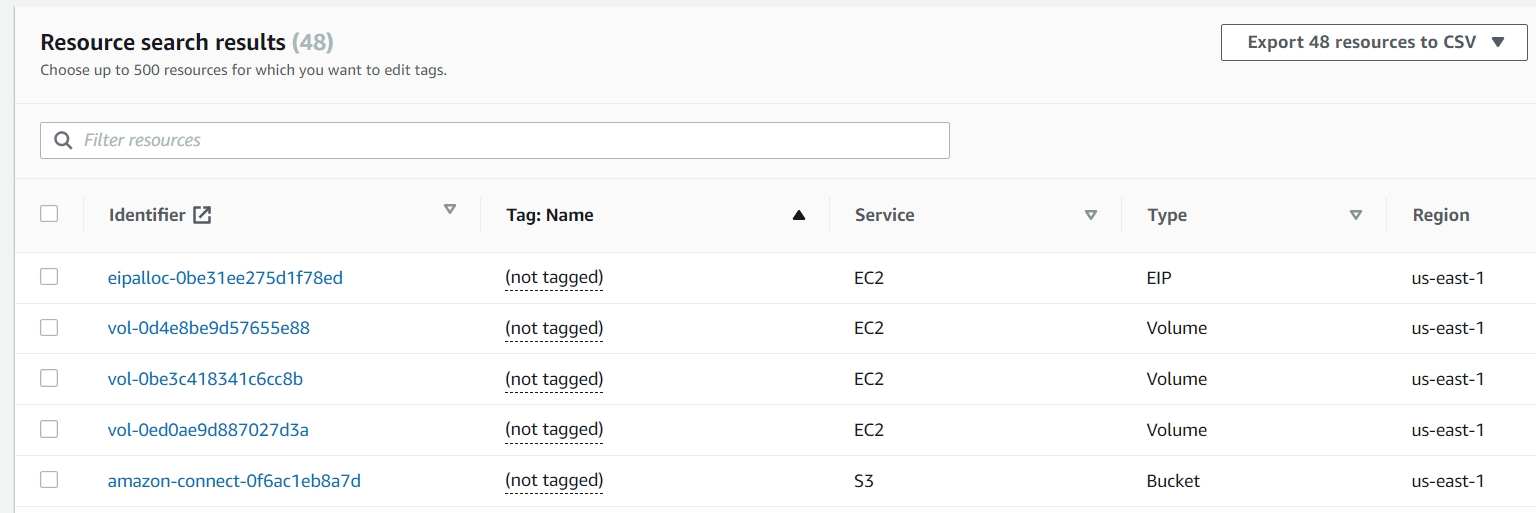
Here are the results from our search. As you can see, you can easily pull up very many resources – here is where filters become essential. There are a few things to keep in mind when working with this screen.
- The maximum amount of resources you can edit tags for is 500.
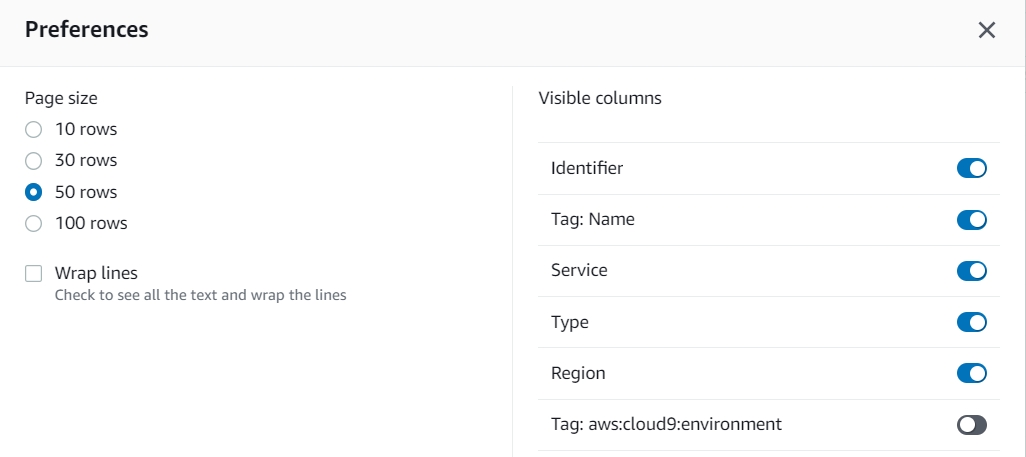
- The gear icon allows you to open the preferences and increase or decrease the amount of results per page.
- This is important when trying to select similar resources in groups.
- Also you can choose to show which tags to be displayed. For example, you pull up all resources with no environment tag, but want to sort them by another criteria.
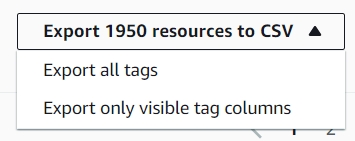
If you’re not ready to make tag changes yet – this is still a very powerful tool you can use to analyze and gain a deeper understanding into what is happening in your AWS account. Here you can use the export function to get a downloadable version of these results in CSV. Two key options here
• Export All Tags: Every single tag will be displayed
• Export Only Visible Tag Columns: only the ones you selected to view with gear icon will appear here. Good for quick analysis on a small number of tags.
Big Spenders and Sneaky Spenders
Watch out for the following:
• EBS Volumes: Even if your instances are stopped, you still continue to incur costs on these.
• Unattached EBS Volumes: Check your account for stale, unattached volumes no longer being used. Do you think you may need it someday? Great – take a snapshot and then remove the volume.
• Provisioned IOPS EBS Volumes: These can drastically increase your AWS bill. Make sure you know your requirements and provision accordingly. When you are done, be sure to snapshot or remove these. This is especially true with lower environments, where many iterations of applications can be tested, and someone leaves a high IOPs EBS volume sitting in the account generating hundreds of dollars in AWS spend with no return on this investment. Watch your assets!
• Elastic Ip Addresses: While not as big spenders the previous – this one is ‘sneaky’ in that if you leave them unattached you will be billed. When you are done with an elastic IP be sure to release it.
Making Some Changes!
Next comes actually updating your tags. A first, and simple use case we can look at is:
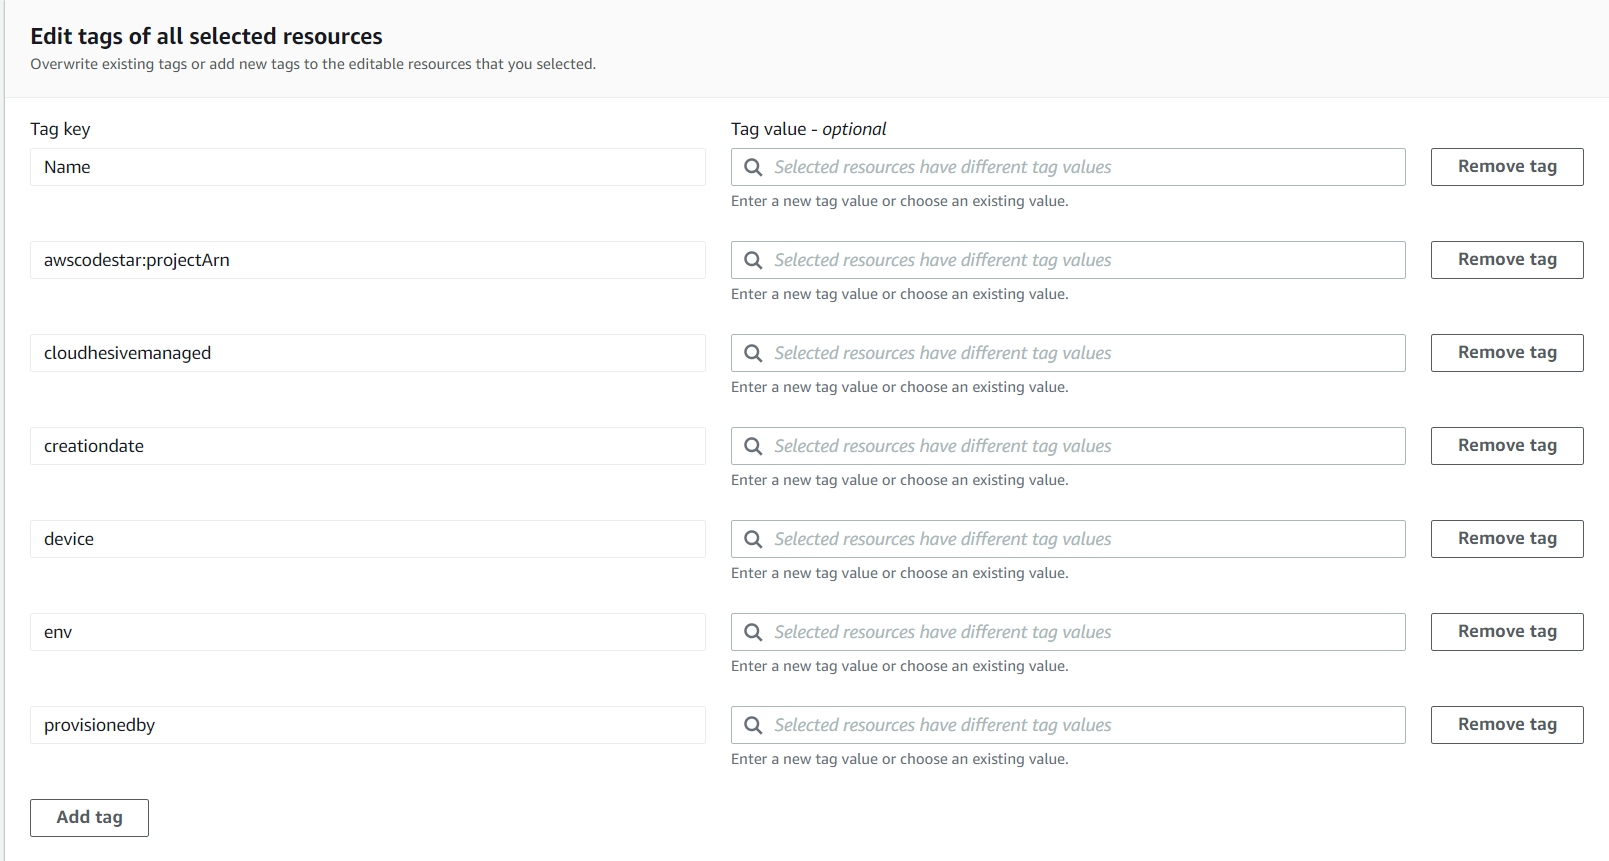
Scenario 1: You need add a new tag called: Project – to all your resources. Simply click the add tag button at the bottom and you can do this for up to 500 resources at a time. With that you can add the tag without having to input a value. You can also add values, but it will apply to ALL the ones you selected. You can’t subdivide here, so that’s where the option to limit your row results to something like 10 or 20 can make it easier to do this. For one big blast instead, go for 100.
Scenario 2: You have an issue with cAsIng of your tags. Remember tags are case sensitive. Environment and environment and environmenT will show up separately on reports, potentially leading to some confusion. These will all show up here. What you can do on this screen is also remove tags. Again, this will affect all selected resources so do be careful.
Scenario 3: All the existing values for the Owner tag need to be changed. Great, simply input the new name and update all the values here. When you select each search box it will show the different values currently assigned. You can select one and it will override and replace that value for all your resources, or you can type in a new one to affect all these.
There’s a lot of power here and some nuance to getting your tag wrangling in order. With a little bit of practice and proper filtering you can make quick work of any size tagging initiative.
AWS Tag Tamer
Next I want to show you a new solution developed by AWS that you can add to your arsenal – the Tag Tamer. This exciting new solution was released this Summer by AWS. .This one is a little more involved in that you do have to deploy the solution. What you get for your efforts is a pre-built user interface with powerful cross-account access, a centralized tag repository, and the ability to control and enforce tagging.
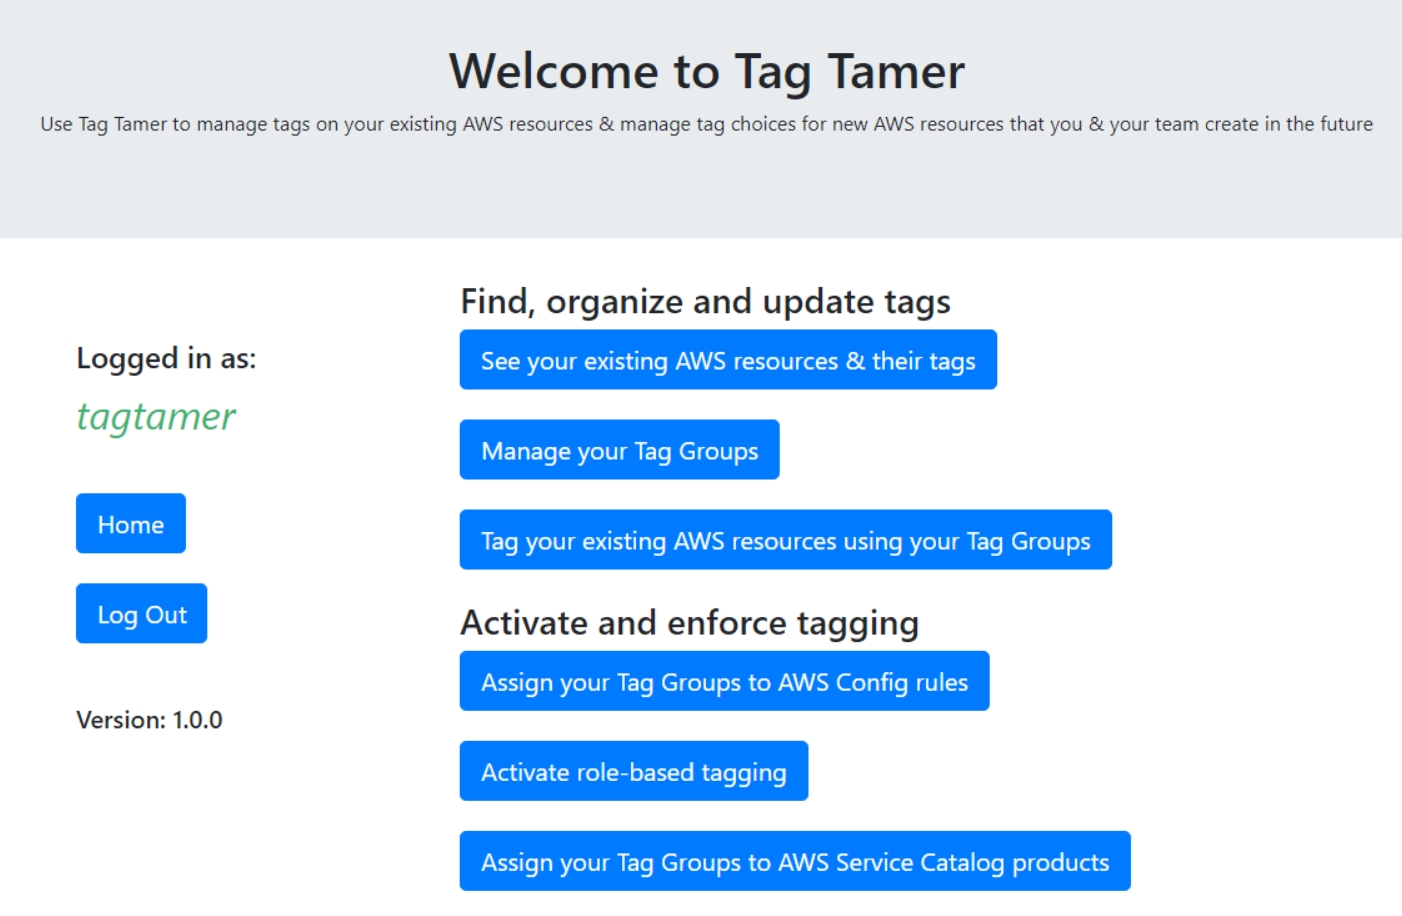
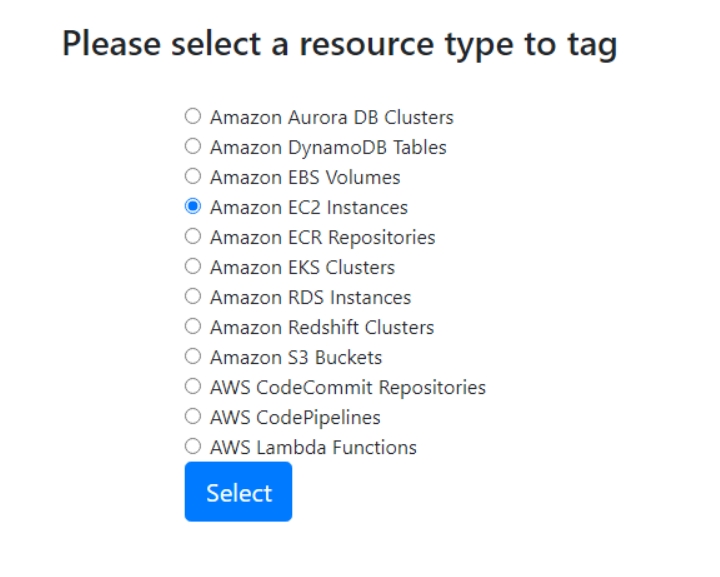
Here is what the user interface will look like, once deployed. Amazon Cognito is used for authentication, which the guide will help you to setup. Aside from it’s primary purpose to help you with tags, this is a nice way to get familiar with a few more AWS services you may not commonly use.
Here are the different AWS Services that are displayed for tagging in version 1.0. Not as granular as the Tag Editor in the console, though I find this makes Tag Tamer easier to use.
My favorite part of this solution is the cross-account access. You can set it up in one account (does not have to be a Master account in an Org). After the solution is deployed, simply add cross-account roles pointing back to the source account, and Tag Tamer will read results from all accounts and display it to you. These results are downloadable for review, same as Tag Editor. When setting it up, be sure role names are same named across accounts.
Tag Enforcement
Once you have all of your tags under control – what are your options to keep them in line?
AWS Tag Policies
One way to go about enforcing tag compliance, without Tag Tamer – is to use Tag Policies. These are used with AWS Organizations. These policies that you create will block resources from being created unless they fulfill the requirements laid out in your tag policies. Do be sure to practice this and start small, it can quickly limit productivity in a team by stopping what they can do. This is known as hard enfocement.
Soft enforcement can also be done via AWS Config – setting up required tags, and running reports that will show you noncompliant resources. You can then and using some of the tools we discussed to fix them.
AWS Tag Tamer Enforcement
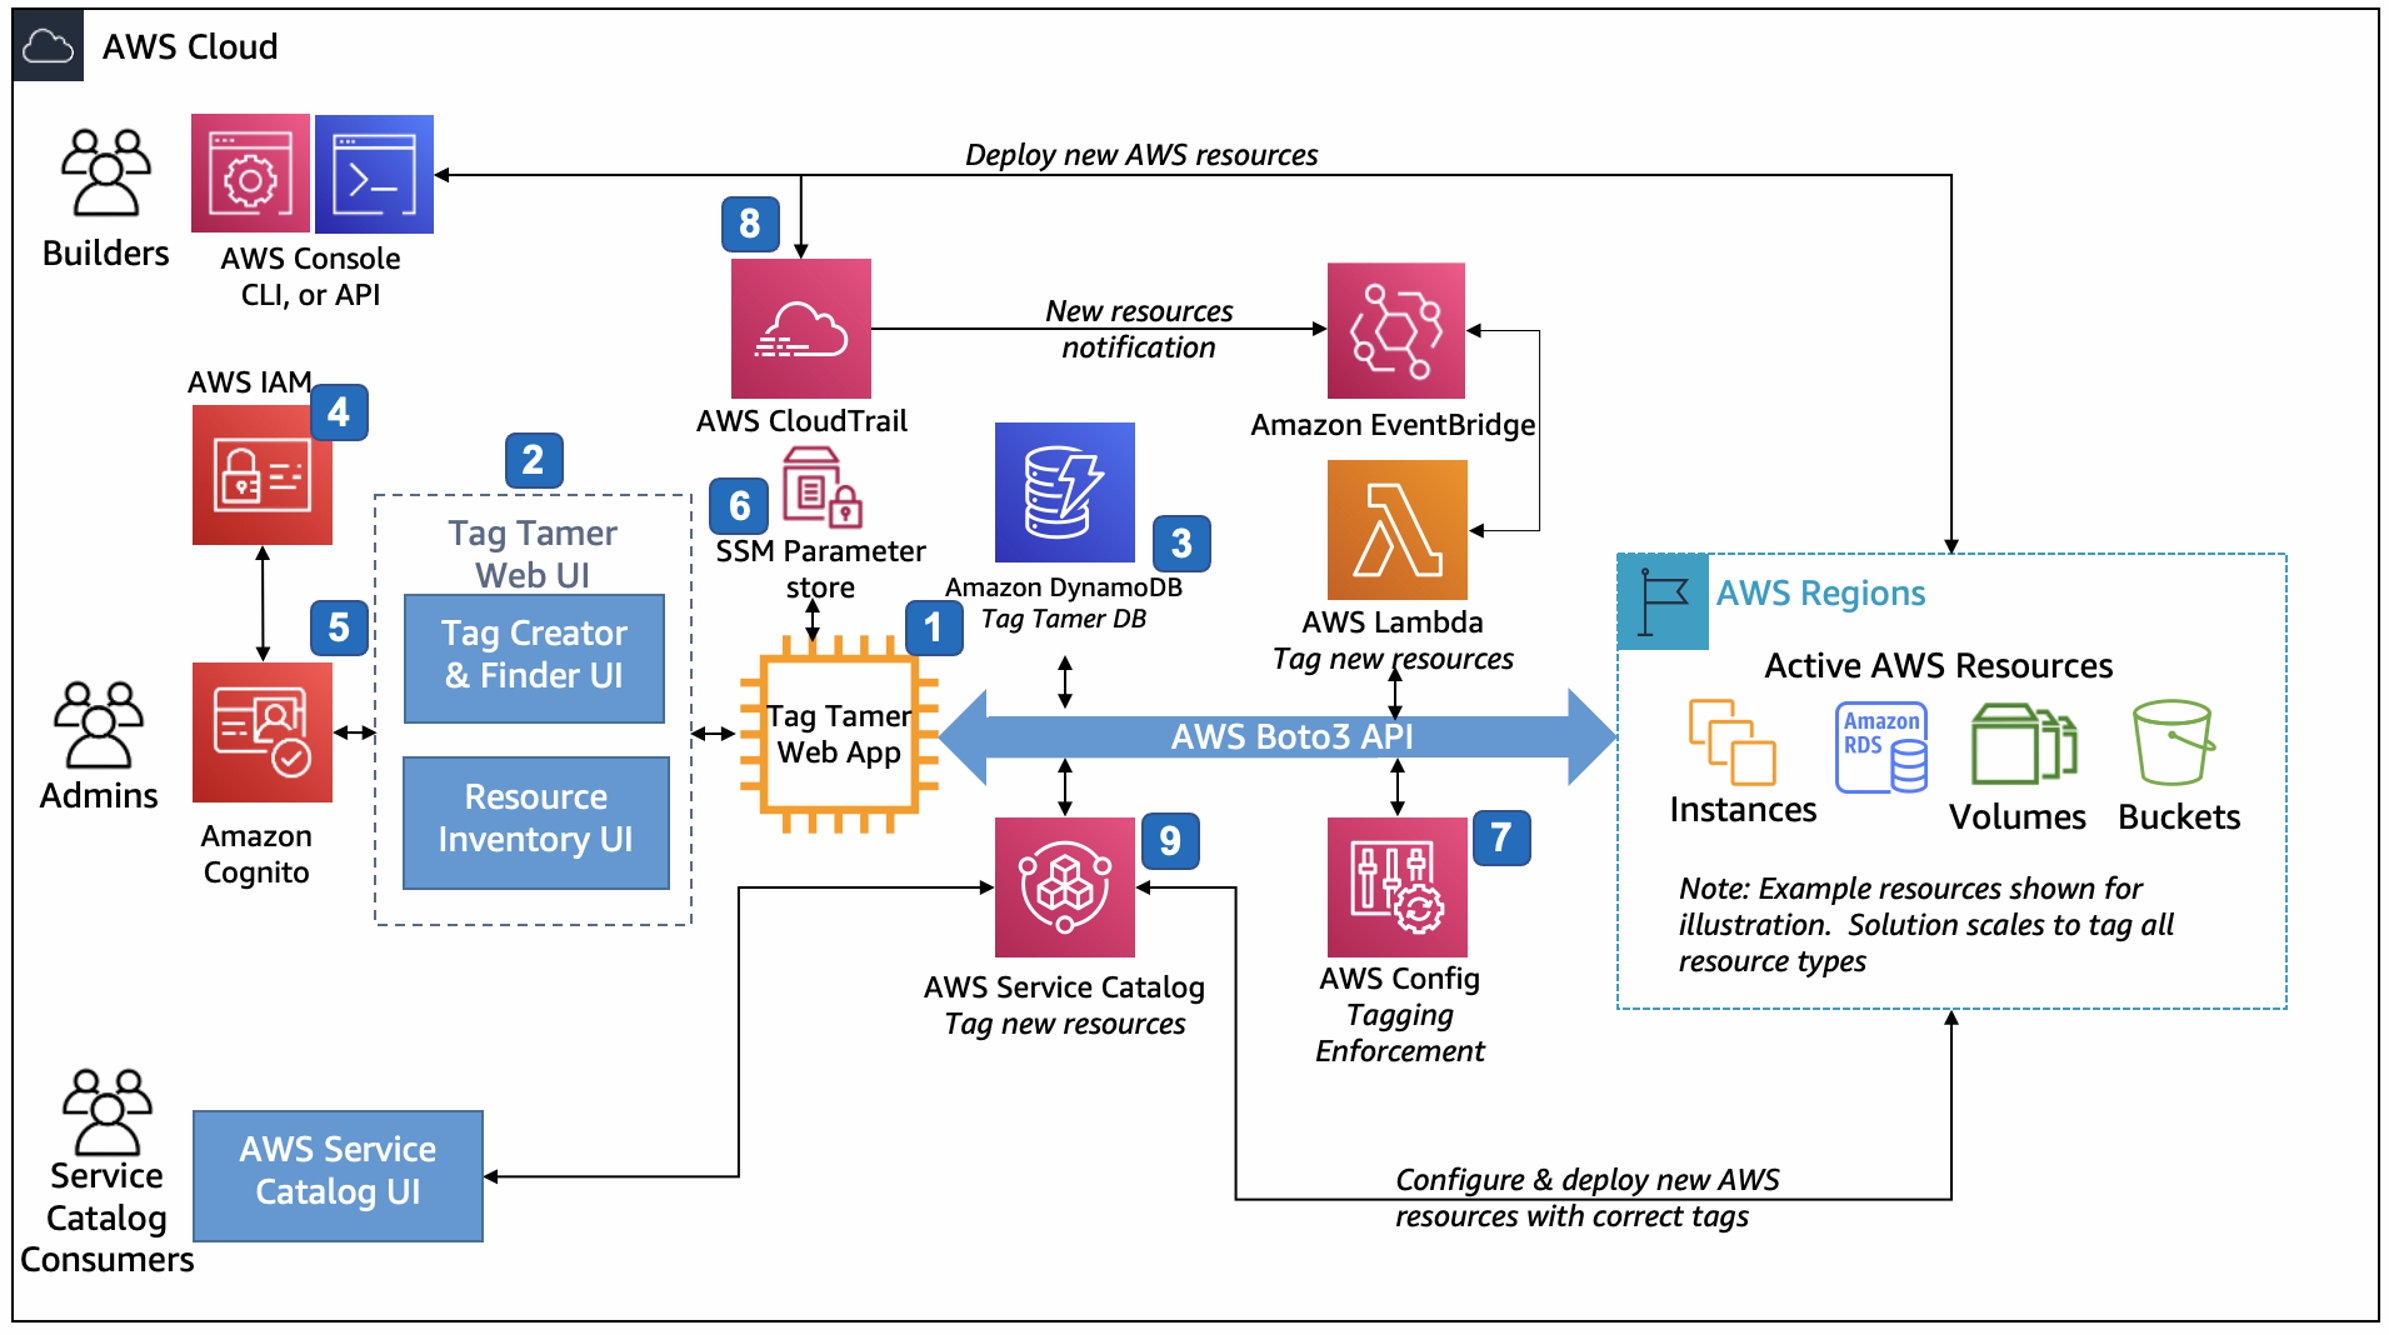
Tag tamer brings a number of more advanced features to automate your tagging solution. Here is the enforcement flow as described in the Tag Tamer Implementation Guide.
• Administrators assign the required tags to AWS Config required-tags rules. The required-tags AWS Config rule alerts, and optionally invokes remediation actions, when AWS resources do not contain the resource tags the administrator specified.
• As users create new AWS resources, Tag Tamer applies your organization’s required tags using an automated workflow delivered by AWS CloudTrail, Amazon EventBridge, a resource tag repository stored in Amazon DynamoDB, and AWS Lambda tagging functions
• Tag Tamer updates AWS Service Catalog TagOptions so AWS Service Catalog users can easily select and apply an organization’s approved required tags when users launch new products within AWS Service Catalog.
Resources
AWS Tag Tamer: https://aws.amazon.com/solutions/implementations/tag-tamer/
Tagging Best Practices Whitepaper: https://d1.awsstatic.com/whitepapers/aws-tagging-best-practices.pdf
YouTube – Davo’Clock: Deploying and Testing AWS TagTamer
Video: AWS re:Invent 2020: Cost allocation best practices
Documentation: AWS: Managing Tag Policies
Jorge Rodriguez
Lead Cloud Engineer
[email protected]


