Amazon Connect Contact Lens lets you label and analyze contacts – here is how to set it up

Monitoring various business processes and collecting data is essential to leveling up your call center service. Intelligent surveillance of set parameters in customer-agent interactions helps fine-you’re your customer service strategies.
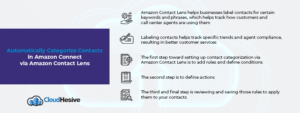
Amazon Connect Contact Lens makes it easy for you to not only categorize contacts for certain keywords and phrases but also automate and enhance security and operations.
There are some valuable benefits associated with the Contact Lens categorization option, which will be touched upon later in this blog post. But first, let’s look at how to activate the functionality.
Setting up contact categorization via Amazon Connect Contact Lens
There are three steps involved in setting up the Contact Lens categorization feature.
1. Defining conditions
2. Defining Actions
3. Reviewing and saving
Let’s dissect these steps one by one.
Defining conditions
1. With a user account that is enabled for rules permission or assigned the CallCenter Manager security profile, log into Amazon Connect.
2. Go to the navigation menu and choose Rules.
3. Select Contact Lens in the option Create a Rule.
4. Give the rule a name.
5. Under the option When, select post-call analysis or real-time analysis under the drop-down menu.
6. Select Add Condition and then choose the match type from the three available options:
Exact Match: This option lets you find exact phrases or words
Semantic Match: This option helps you find words and phrases that can be synonymous. Words such as “upset” can be matched with “not happy,” and words such as “unsubscribe” can be matched with cancel subscription. Phrases such as “thank you so much for helping me out” can be matched with “I am so happy that you helped me” and “this is so helpful, thanks a lot.”
For best results, provide words and phrases with similar meanings in the semantic matching card. You can provide up to four keywords and phrases for a single matching card.
Pattern Match: This option helps you find matches for words and phrases that are less than 100% exact. Distance between words can also be specified. If you want to track the word “credit” but not “credit card,” you can specify a pattern matching category to search the word credit with a one-word distance from the card.
7. Enter the words and phrases you want to highlight and separate them with commas. Now choose Add. Each of your words and phrases separated by a comma will be arranged in their own line in the card.
8. Choose Add group of words or phrases to add more words or phrases. You have to add the words and phrases in two different sections that are connected with an AND. One section is for the words or phrases uttered by the customer and the other one is for the agents. The logic used to read these two sections operates in this way: (section 1) AND (section 2).
9. Now choose Add Conditions to make the rules applicable to:
- Specific queues
- When contact attributes have certain values
- When sentiment scores have certain values
For more information on this step, visit this Amazon’s admin guide on rules.
Defining actions
Amazon Connect not only lets you categorize contacts but also lets you define the actions to be taken with them.
1. Generating an EventBridge event: After the call or in real-time, you can use the events you get to initiate alerts or notifications or aggregate reports outside Amazon Connect. See this Amazon admin guide to Contact Lens rules to learn how to generate an EventBridge event.
2. Creating a task: Once the contact is categorized, you can also create a task post-call or during the call. This functionality is all about building rules that generate tasks that help you pinpoint issues in the contact center to follow up and have traceable actions with owners. For example, you can create a task to review a customer who could potentially be fraudulent. You can also follow up on a particular customer who mentions certain services or products that you want to upsell on. This functionality can also be used to follow up when there is a grave quality issue. Go to this Amazon admin guide to Contact Lens rules to know how to create a task.
Review and Save
When all the above-mentioned steps are completed, choose Save. The rules will be applied to all new contacts and be in action when Contact Lens analyzes your call center conversations. You don’t have the option to apply rules to conversation data stored in the past.
Benefits of Contact Lens contact categorization
Contact categorization in Contact Lens can be useful when you are on the lookout for certain words uttered by the customers to track things like negative sentiments. It also allows you to ensure that agents are complying with instructions and speaking the words or phrases they were told during their training, such as standard greetings and sign-offs.
CloudHesive
CloudHesive is an AWS partner company that is dedicated to helping businesses leverage cloud services for reducing operating costs, optimizing business processes, and increasing revenue generation.
We have the experience and expertise to provide you with the right technical help for all your cloud-based needs. For more information, contact us today.


